DIY Get Ready of your Facebook Profile Picture!
Yes, we all know. Girl's profile pictures are 100x better than their original face. There may be several resins for this but the two main reasons are makeup, and natural photoshop. Today, we will be introducing a way to photoshop you Facebook profile picture!
1. So this is my desktop! Get ready with the photo you would like to photoshop!
2. This is the photo I will be photoshopping. Press command+shift+4 to screenshot your photo like this! Don't make it fir perfectly!!
3) tip: you can also view your photo by clicking on it once, then pressing the spacebar.
4. Now go to a photoshop page called pic monkey! Press the link below to go to the website.
5. Upload your screenshot by clicking on Edit a photo, then your screenshot.
6. This is how it should look like after uploading your photo.
7. Click on Exposure, than get the brightness up to your style. This will make the photo look soft, and will also get rid of some fuzzy and rough surfaces.
8. After done with your exposure, go to a menu called Weight Loss.
9. I prefer doing this 50%. It makes you look a bit more skinnier and taller.
10. Now we will be doing our ultimate photoshop, CLONE.
11. First, pick a source point that is closest to your skin. (The point should be on your hair)
Tip: Before cloning, please make the photo size bigger by clicking on the number located on the bottom right corner.
12. Slowly drawing over the large face, make it look skinnier.
13. Work on it on the other side too! Beware of the fingers in this case.
14. Make final touches on drawing your hair and make it as natural as possible.
15. Don't forget to make your chin look sharp! (V-Line)
16. Make your very final touches to make your head look smaller and sharper.
17. Because we cannot use the pic monkey royal effect, we screenshot it. Use the size I used as a mini-tip!
18. To upload a new photo, you have to click 'don't save' on the photo you were working on.
19. Now upload your photo!!
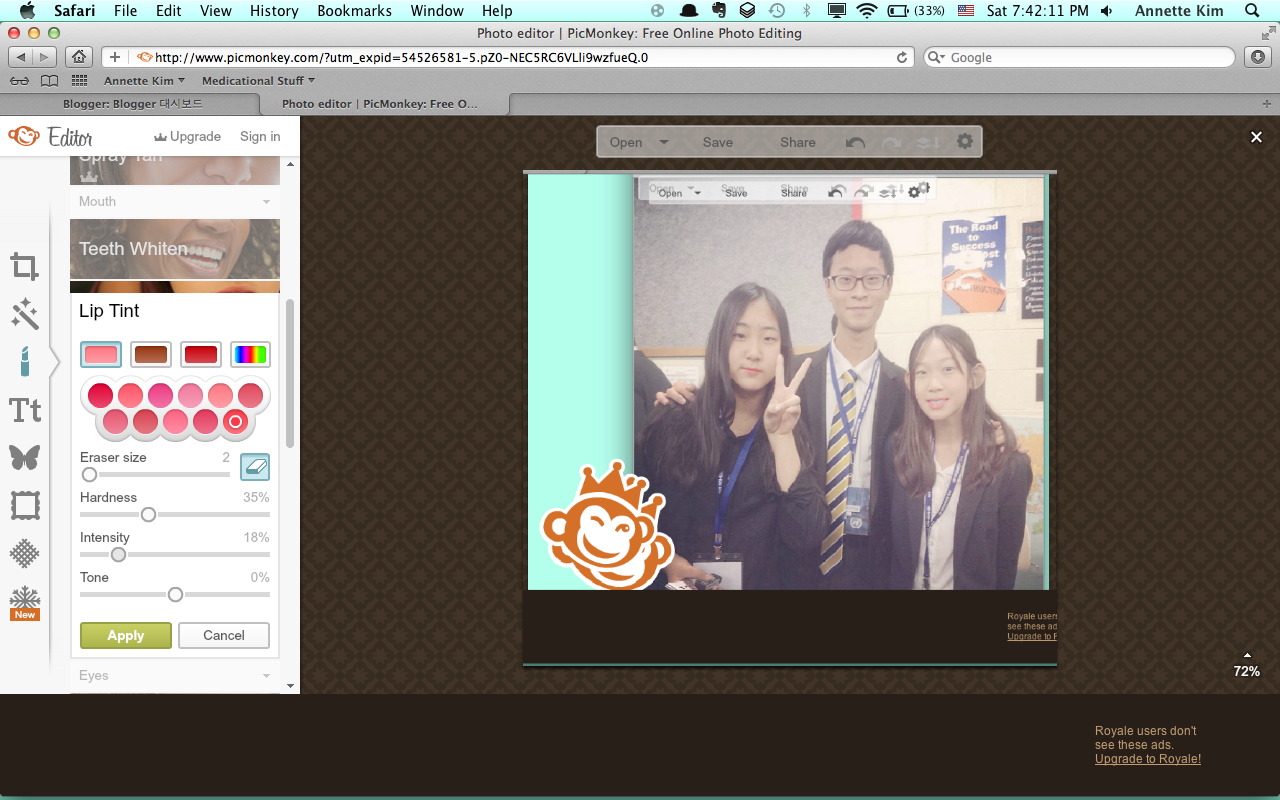
20. Lets begin our lip tint!
21. Get the photo big, and paint on the dull grayish-pink lips. It looks too pink? No worries!
22. Use the intensity to get the color natural!
23. This is not a royal effect, no need to screenshot~ Now lets work on our eyebrows!!
24. Draw a line, following your light eyebrow lines. Be careful with your brush size! You don't want to make your friend have giant eyebrows That has a dull end!
25. Play with the eyebrow colors we have here! It looks like she dyed her eyebrow, lol.
26. Black matches her the best, let it fade just enough so that it looks natural.
27. Now we will work on the other one!! The DUMBO!! heh heh
28. Do the same clone effect but not too much. Her head size cam out pretty okay anyways.
29. Get a source on the wall and erase the ears that came out, and get a source on the hair to erase the rest of her ears. DUMBO ears tend to be my complex. :'(
30. Look how it looks like..?
31. Aaaannndd,, I hate how it looks like so I will be clicking a lot of backs to get rid of the work I just did. But the the chin cutting part.
32. Okay, back to normal..;; Paying around can be practice too!!
33. Just like what we did last time, screen shot this!!
34. Have a tint getting on the DUMBO friend too! Match her skin tone and get a brighter color.
35. Next, work on her eyebrows just like what you did before.
36. Did you realize something odd on the photo above? Dumbo girl dyed her hair brown, so you will need brown eyebrows. (Well, dark brown to be more accurate..)
36. Compare the eyes with the two girls.
37. Because the dumbo girl's eyes are a little lighter, go to eyeshadow, and get a back circle going on in the eyeballs.
38. Get it natural by using the 'fade' tool.
39. Now the pretty complex part, Nip&Tuck!!
40. We HAVE to fix out Asian eyes so click on the needle(Botox) and get the circle size cover all of the eye. Then, click ONCE.
41. Do the same to the other girl, we need it to be proportional.
42. Play around with the strength. "We have frog eyes now.."
43. Get it natural, and we will now work on the boy..!!
Don't say, 'Boys do photoshop too? Thats sorta ridiculous!!' Because we are going to uglify him!!
44. Make his face look bigger by using the Botox needle! Divide it into half, and click on it 2 times.
45. This is a royal effect, please screenshot it!!
46. See how the dumbo girl is smiling? Please make her teeth white because we don't want any yellow!
47. Now we are done with face touches, going on the the effect!!
48. Making the photo clear makes you look skinnier and have bigger eyes! Do get it like that!
49. But we don't want sharp photos.. Using focal soften effect, make the photo soft, excluding our faces...
50. If you want to add a text.. Do it like this!! Choose a font of your favorite...
51. Haha~ I just wanted to tell you thank you for going down till' here...
52. But I want this SEOMUN' 16 because this is a photo I took at the SEOMUN debate club! It took place in SFS!
53. Now save you final project!!
53. Name it So that you can find it~~
54. Look at me screenshots;;; God;;; (btw, it took years to upload and write)
55. We have to crop the background and the monkey out! We don't want people to know that we photoshopped it;;
56. Select the part you want and used command+c then command+n to get a new copy!
57. Name your file~~
58. This is the photo you will get!! But it this good for a Facebook DP? The shape it not good for a Facebook Profile Picture.
59. But if you make simpler touches and make it a bit longer....
60. It becomes a perfect Facebook Profile Picture!!
You may use the original photo to practice photoshopping your DP!!
Thanks for watching! Have a great day, and good luck with your photoshop!! :)
- Uploaded by: Annette Kim